Search results
All products that match your search:
While the days are getting shorter, our horse’s coat is getting thicker. The teddy bear coat is cute to look at but hard to dry after intensive training. If you want to avoid using a cooler sheet all the time, you can clip your horse to get rid of his thick coat. This blogpost tells you all about the basics of clipping.
There are a lot of different things you have to ask yourself when you’re considering clipping a horse. How is the weather normally in my region, will I be training a lot, is the horse outside for most of the time?
If you decide you want to clip your horse, you have to think about what kind of clip you want to give him. If you are a competition rider, you might want a full clip. But if you’re a recreative rider a partial clip, could be enough. On Google you can find the different types of clips, like hunter pattern or Irish pattern.
The winter coat starts to develop around September. Most people start clipping in October when the winter coat is fully developed. This avoids problems with shedding. As the coat keeps on growing, most people clip a second time in January/February. The most important thing here is, look at your horse. For some horses, the winter coat is developed later, and you clip just once during the winter season. While other horses might need 4 or 5 clips because the coat grows back rapidly. If you have an upcoming event, clip your horse 3 weeks in advance to avoid seeing the clipping lines.
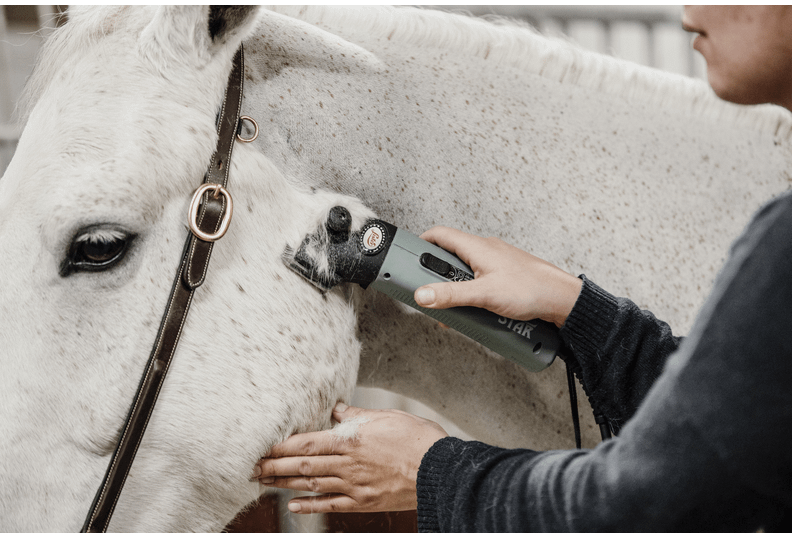
To start clipping, make sure you prepared everything in advance and have everything you need around. Use a big clipper for the larger body parts and a small one for smaller parts like the head and the legs. When you want to start clipping, let the horse get used to the sound of the clipper. Then start by making long strokes against the direction of the hair growth. Let the strokes overlap to make sure all hairs are clipped. If the skin is wrinkled, like the elbow area, pull the horses skin tight with your hand to make a smooth surface.
During clipping, check if the blades aren’t getting hot. If this is the case, let the clipper cool down. Make sure to oil the blades and remove all loose hairs every 5 to 10 minutes, to prevent the blades from becoming dull. Also, take your time. Good things take time.
After clipping the horse is extra sensitive. Before putting on the rug, brush your horse with a soft brush to get rid of all loose hairs. Since you’ve removed your horse’s coat, make sure to put on a rug. Check-in on your horse regularly and make sure he’s not too cold or too warm. You might need to change rugs since the weather varies from day to day. Because your horses’ skin is sensitive, chose a soft rug to avoid rubbing marks. 80% of our rugs are lined with artificial rabbit skin, this is very soft to the skin and therefore ideal for freshly clipped horses. For daily use, you can use our artificial sheepskin products. These products are very soft and skin-friendly, especially for clipped horses.